We’re super excited to announce that we have given the Monkey Tools calendar creator feature an upgrade. In fact, it is so much of a power up, that this feature has graduated into its own full grown monkey! We call it the Calendar Monkey.

In our initial version, the Calendar Creator would create the queries necessary to load a single column calendar of unique dates into the data model and add PeriodID columns for 364-day calendars like 445 and 13 fiscal periods.
The Calendar Monkey adds a couple of pretty powerful features to this original mix. Let’s walk through the experience quickly to see what I mean.
Step 1: Define the Calendar Boundaries
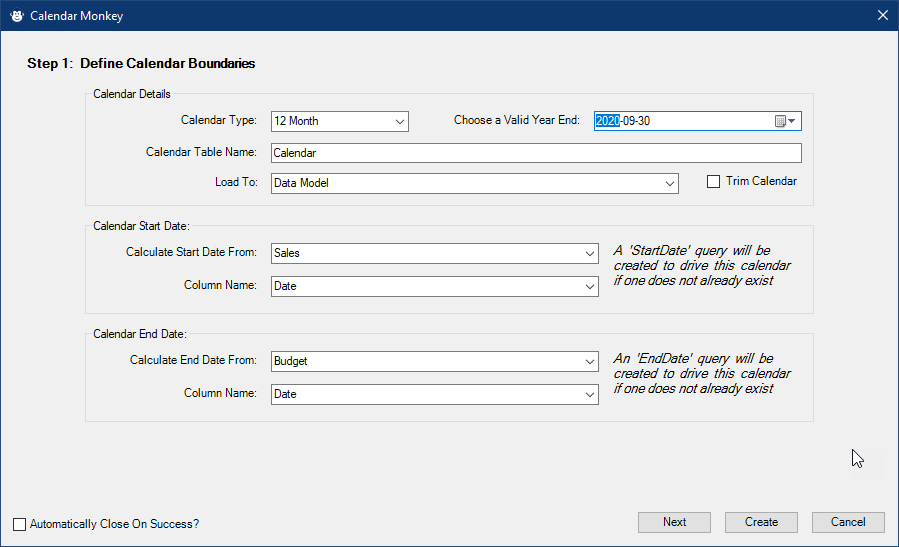
Not much has really changed here. You can still:
- Pick your calendar type (12 month, 13 month, 445, 454, 544), and define your custom year end (including a different month for 12 month calendars.)
- Define a name for your calendar table query
- Choose the load destination
- Pick any valid date columns for the Start and End date of your data
These settings allow our monkey to build the calendar to dynamically span the entire range of your data on every refresh.
The only real difference here is that we’ve added a checkbox and a Next button. (Notice that Create is still available, if you just want to accept the monkey’s default choices for the rest of the options you’re about to see.)
Step 2: Choose Calendar Columns
One of the things that always bothered us about our original version is that it created the calendar’s Date column, but then left it up to you to add the different date formats that you wanted. So we decided to improve that, as you can see here:
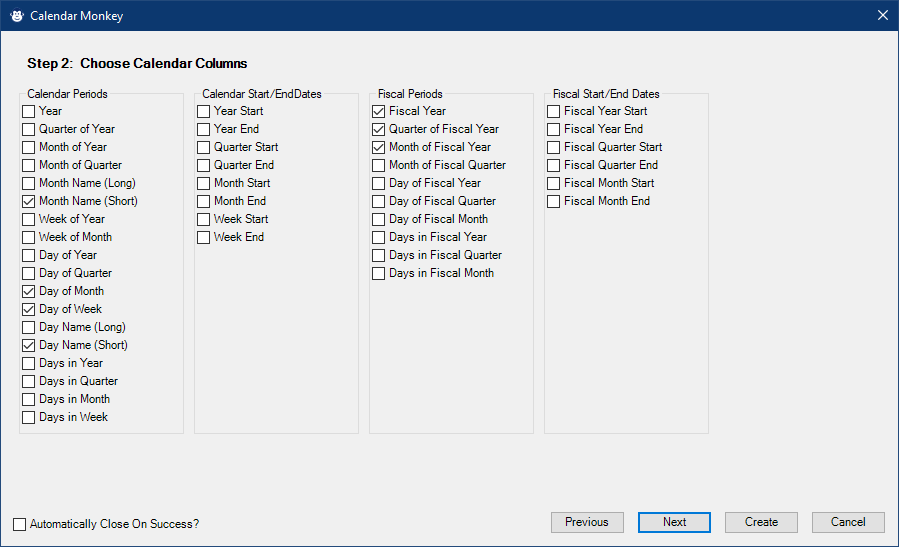
Our monkey pre-selects the most common date formats, but if you ever check/uncheck one, it will learn your preferred defaults and provide those next time you go to inject a calendar. The columns shown dynamically react to your choices in Step 1 as well… if you use a Dec 31 year end for a 12 month calendar, you only need the first two columns – so that’s what the Calendar Monkey will show you. If you have a custom year end (like Jun 30 or Sep 30), you may also want Fiscal columns, so the monkey provides those as options too. And if you work with a 364-day calendar like a 445 variant or a 13 fiscal periods calendar… there is a final column of PeriodID’s that shows up in that blank spot too.
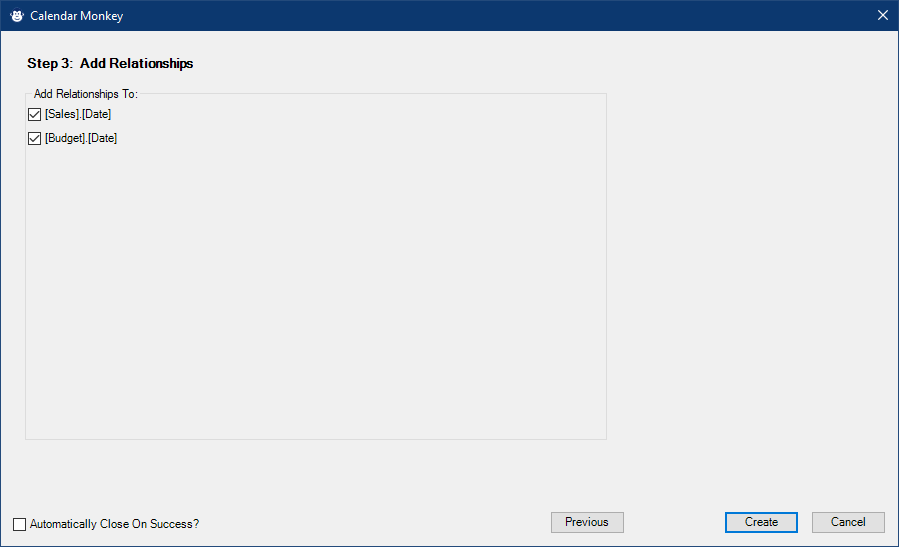
Step 3: Adding Relationships
Depending on your choices in Step 1, the Calendar Monkey will determine if you will be presented with this page or if it will be skipped. If you choose to load your calendar to the Data Model (or Data Model & Worksheet), the monkey will list every date column loaded to the data model. The purpose of this is simple; let you decide if your new calendar table should be linked to any of those columns listed.
For any columns you check, Calendar Monkey will do its best to create those relationships after loading your table to the data model. (There are some things that can prevent the monkey from accomplishing this, such as creating an inactive relationship.)
Step 4: Creating the Calendar
Even though the Calendar Monkey has a lot of work to do when you click create, it also knows the value of good feedback. For this reason, it will update you as to the progress as it completes all the individual tasks, as you can see here:
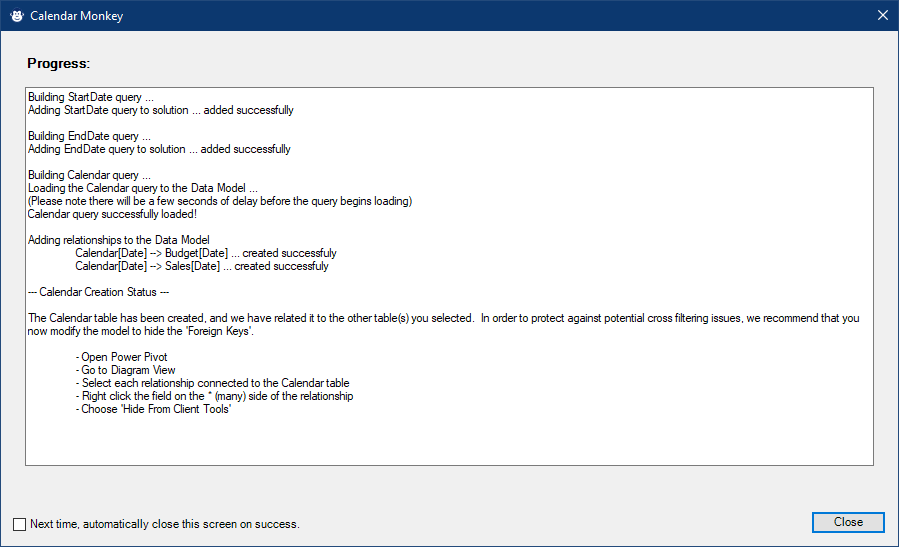
Now unfortunately, there are a couple of things that the monkey is unable to do (thanks to a lack of security clearance with the Excel data model). Rather than just ignore these essential tasks, however, it will tell you what needs to be done, with the exact steps to do so.
As a bit of a pro-tip here… you don’t actually need to close the Calendar Monkey window to take action on those steps… so keep it open until you’ve hopped into the data model and made the advised changes! Of course, if you understand what’s happening, and know the steps you’ll need to take, there is also an option to automatically close the summary screen upon completion as well.
What the Calendar Monkey cannot do
There are three things that the Calendar Monkey can’t do at this time:
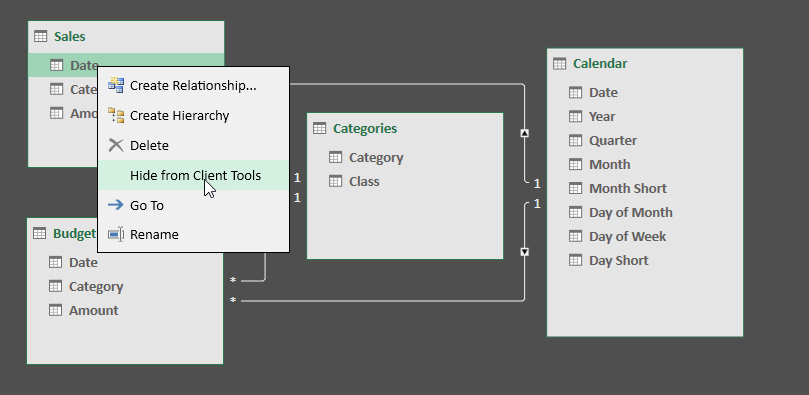
- Automatically hide the keys on the “many” side of the relationship (the foreign keys)
- Automatically create the sorting hierarchies to sort Month Name by Month Number and Day Name by Weekday Number
- Create the calendar in a Power BI file
Honestly, while we joked earlier that the Calendar Monkey doesn’t have security clearance, the reality is that there is a limitation with the data model’s extensibility model which is preventing us from solving the first two items. The third… its on our backlog.
So how do you get the new Calendar Monkey?
You need Monkey Tools version 1.0.7493.29574 or higher, and you'll have the Calendar Monkey ready to do your bidding.
If you haven’t already, head over to the Monkey Tools product page to download a copy
If you already have Monkey Tools installed, it will automatically update within a couple of weeks, or you can request the update now by going to Monkey Tools -> Options -> Check For Update Now…
3 thoughts on “Creating Power Query Based Calendars”
Pingback: Erstellen von Power Query-basierten Kalendern | Anfänger Kurse
Pingback: Introducing the Measure Monkey - The Excelguru BlogThe Excelguru Blog
Pingback: More free features in Monkey Tools - The Excelguru BlogThe Excelguru Blog