Part 1 of this series can be found here.
In this post, I'm going to show a few more examples of customizing the ribbon using buttons. (We'll get to other types of controls later.) All of these are variations of the schema set up in the first post linked to above.
Three Small Buttons to a Column
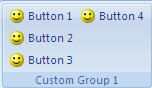
In the example from our previous section, we saw how to add three new buttons to a group in the ribbon. The following XML adds a forth button, (no major excitement there,) but it does show how to start a second column in the group. (Similar to text wrapping.)
[code]


[/code]
The end result looks like this:
Adding the Group to an Existing Tab
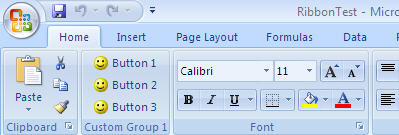
This time, we'll add the the group to an existing tab. We'll go back to the three button scenario, and put it right next to the clipboard on the Home tab. (I'm not suggesting you put your items there, as this is only an example.) So here's the code to do exactly that:
[code]


[/code]
Notice that the XML to create the tab only declares the tab idMso = "TabHome", rather than going through whole CustomTab setup portion. In addition, though we do need to specify where the new group will go, so we need to add the insertAfterMso="GroupClipboard"
And by the way, just to make this more fun, the XML markup is case sensitive. 🙁
The net effect of the above XML is the following:
Adding Big Buttons
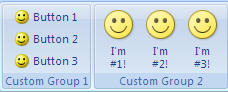
Now we'll go back to the original example from the first post again. This time, however, we'll add another custom group, with three large buttons on it. (This is in addition to the original group.)
The code:
[code]


[/code]
The only real difference between the XML used to create the button is the inclusion of size="large" in the second group. Without that, the buttons end up being small and stacked on top of each other, as in our first example. With the size clause included, they are bigger and placed horizontally in the group, as shown below:
Mixing Button Sizes
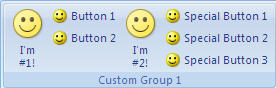
The final example of this article will display mixing the large and small buttons. This time, all the buttons are on Custom Group 1 of the Custom Tab. I've mixed up order though, and dropped Button 3, just to show how the mixed sizes will display.
[code]


[/code]
The output from this XML is shown below:
9 thoughts on “Modifying the Ribbon – Part 2”
This is really Great! Everything worked as described. Thank you so much. But...how can I specify my own custom icons? Or any other icon? Where do the icons "live" and what is the file format?
Thanks again for a very clear explanation.
Hi Annemarie,
For choosing other Microsoft images, see part 3 of my Ribbon blog posts here: https://excelguru.ca/2006/11/26/modifying-the-ribbon-part-3/
You may also be interested in a tool to make the browsing easier. You can find one here: https://excelguru.ca/2007/05/05/identifying-your-imagemso-excel-word-powerpoint/
Using your own custom icons is described in part 4 of my series here: https://excelguru.ca/2006/11/27/modifying-the-ribbon-part-4/
Hope this helps!
Ken
How could we open customize ribbon in Access 2007 development mode
I'm not sure I quite follow that question... What is it you are trying to do?
Thank you for detailed info. But If somebody wants to add his/her own WPF user control then how he/she could?
Hi Vikram,
You'd be needing to reach to VSTO or to a product like Add-in Express to achieve that kind of functionality.
Pingback: Modifying the Ribbon - Part 5 - Excelguru
Pingback: Modifying the Ribbon - Part 4 - Excelguru
Pingback: Modifying the Ribbon - Part 3 - Excelguru