Will Thompson from the Power BI team threw out a question on Twitter today related to Appending Columns with Different Names:
Let's say I have some CSVs coming in where the column names differ from file to file, but always in the same order. I could use PQ's automatic Column1/Column2 etc. names by skipping the header row and then have them all map to the same columns in AS. Then build visuals on top of it that'll pick up the fixed column names from AS. Has anyone written a blog or tutorial that covers that sort of scenario? I want to point someone to some guidance…
No worries, Will, I’ve got your back. 🙂
Setting the stage
To be fair, the data source (CSV, AS, Excel or whatever), really isn’t relevant. It’s all about the process of Appending Columns with Different Names. What we need to recognize is that we need two types of tables here:
- Data Tables: These tables have the data, but have different headers.
- Header Table: This table has the correct headers for the data
And we also need to remember that the Data Table and Header Table columns are always in the same order.
Step 1: Prep the “Data” tables
Preparing the data tables is pretty easy. If the different column names are already showing in the headers like this:

Demote and remove them by going to:
- Home -> Use First Row as Headers -> Use Headers as First Row.
- Remove Rows -> Remove Top Rows -> 1
Your table should now have headers called Column1, Column2, etc…

Do this for each table, then set each to be a staging query:
- Excel: Load the query as a Connection Only query
- Power BI: Disable the Load of the query
Step 2: Prep the Header Table
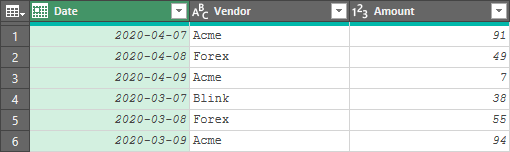
Connect to your data, which might look like this:
![]()
Clean it up by going to:
- Home -> Use Headers as First Row -> Use First Row as Headers.
- Keep Rows -> Keep Top Rows -> 1
You should now have a 1 row query that shows the names of the column headers.
![]()
It's time to save it:
- Rename the Query as “Headers”
- Set it to load as a staging query (as above)
Step 3: Combine the Data
This part is simple:
- Right click the Header table -> Reference
- Go to Home -> Append Tables -> Three or more tables
- Add each of the data tables and click OK
- Go to Use First Row as Headers
- Set your data types
And you’re done:
Sample file (Excel) is available here. But you can import it to Power BI if you prefer that look.
3 thoughts on “Appending Columns with Different Names”
This is a fairly common scenario
So what is the Guidance that will wants to give ??
Hi Sam,
Yes, I'm aware. Will could not find a blog post with specific steps to point his client to. That's all this is.
Ahh... I misunderstood... I thought Will had another trick up his sleeve that he wanted to share 🙂